
BJJ Armbar Training and Drills
How the armbar fits into Brazilian Jiu-Jitsu, and how beginners can build it safely — fundamentals, positions, entries, controlled drills, partner and solo practice, grappling-dummy work and defense awareness.
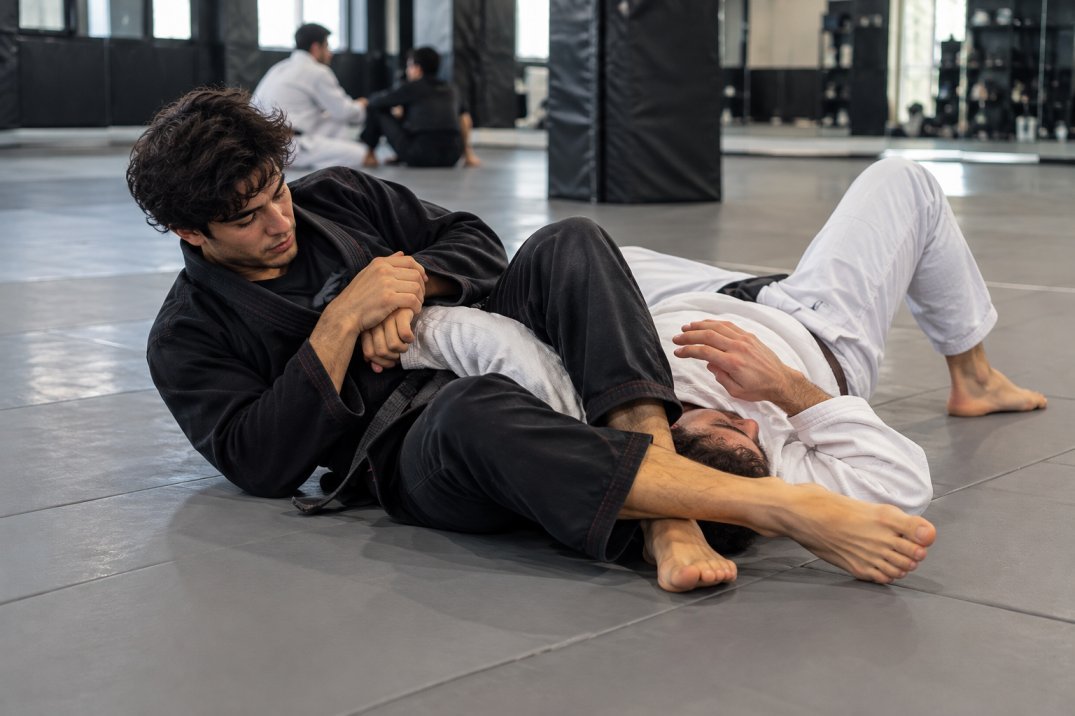
A BJJ armbar is a joint lock that isolates and controls an opponent's arm using your legs, hips and body position to apply straightening pressure to the elbow, ending the round when they tap. Beginners learn the position, arm control and hip alignment first — the finish is what becomes available once control is established.
What is an armbar in BJJ?
The armbar is one of the most fundamental submissions in Brazilian Jiu-Jitsu. In simple terms, you isolate one of your opponent's arms, control it with your legs and hips, and use body position to apply straightening pressure to the elbow joint — a lock they tap to before any strain occurs. It's a joint lock, or "arm lock," and it appears across BJJ, submission grappling and MMA.
The most important idea for a beginner is that the armbar is a position before it's a finish. The submission depends on arm control, hip positioning and body alignment — if you have those, the finish is available; if you don't, rushing it simply loses the arm. That's why armbar training starts with control, not the finish. This page is the armbar-specific corner of the broader topic of submission grappling drills.
Why is armbar training important in BJJ?
Training the armbar develops far more than one isolated submission — it builds transferable grappling skills.
- Submission awareness — learning to see when an arm is exposed.
- Positional control — the armbar demands control first, reinforcing good habits.
- Leverage and timing — it's a textbook example of technique over strength.
- Transitions — armbars connect to sweeps, back-takes and other attacks.
- Guard, mount and back-control development — the armbar lives in all of them.
- Defensive awareness — learning the attack teaches you to defend it.
- Technical repetition — a clear, drillable movement to build clean reps on.
BJJ armbar fundamentals for beginners
Ten concepts that make the armbar work — learn these before worrying about finishing speed.
- Position — a dominant, stable position comes first.
- Arm isolation — separating and controlling one arm is the whole game.
- Control — keep the arm and the body controlled throughout.
- Hip positioning — your hips do the work; alignment matters more than force.
- Body alignment — knees, hips and shoulders organised around the arm.
- Balance — staying based so you don't get rolled or bucked off.
- Timing — the armbar appears in motion and transitions, not from a standstill.
- Transition awareness — knowing the exits if the arm slips free.
- Defensive awareness — recognising the same threat when it's used on you.
- Tapping and safety — apply slowly, and release the instant a partner taps. Tapping early is smart.
Common BJJ positions for armbar training
The armbar connects to several positions. For each, beginners should focus on control first and armbar awareness second — this page stays armbar-specific, so the full position guides are separate resources (planned).
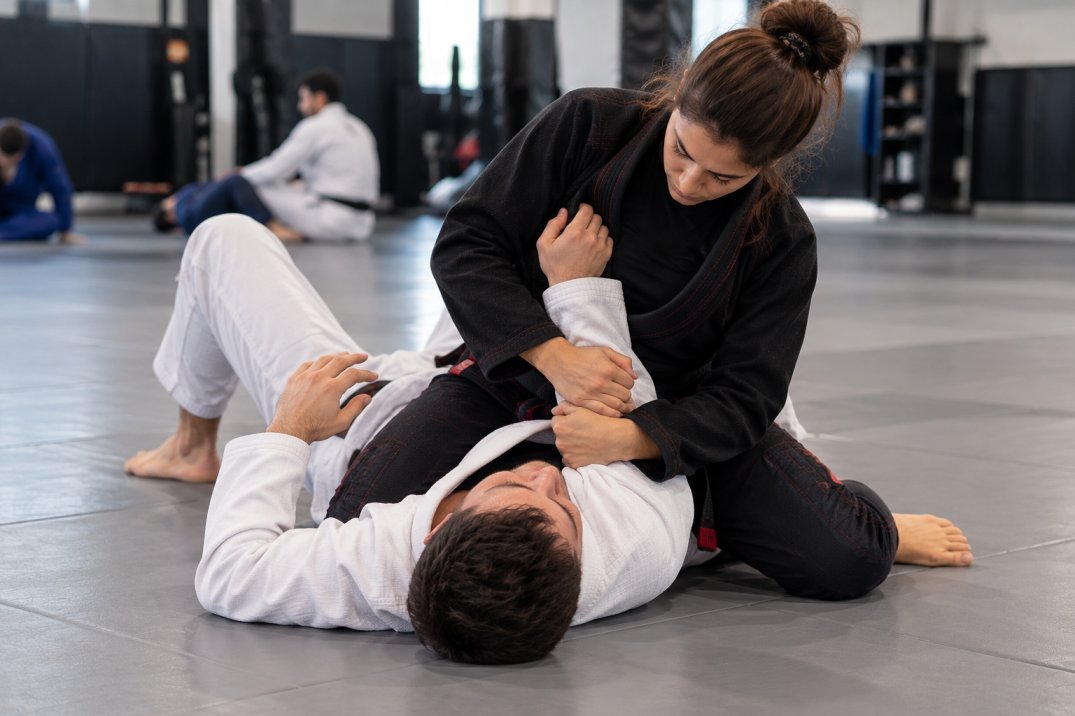
Guard
Why it matters: a classic armbar environment. Focus: control posture and isolate an arm. Opportunity: the arm exposes as your opponent posts or postures. Defense: protect your own arms when playing guard.
Mount
Why it matters: a dominant top position with clear openings. Focus: stability and balance before attacking. Opportunity: arms appear as they defend the mount. Defense: keep your elbows tight when mounted.
Side control
Why it matters: connects to armbar and other attacks. Focus: pressure and arm awareness. Opportunity: a trapped or reaching arm. Defense: protect the near arm underneath.
Back control
Why it matters: transitions can lead to armbar attempts. Focus: maintain the position first. Opportunity: arm openings during scrambles. Defense: hand-fight to protect your arms.
Scramble / transition situations
Why it matters: many armbars appear mid-movement. Focus: recognise the opening without abandoning control. Defense: keep your arms in during scrambles.
BJJ armbar entries
An "entry" is how you move from a controlling position into the armbar position. The concept is the same wherever you start: establish control, recognise the opening, then move into alignment without giving up the control you built. Rushed entries are the most common way beginners lose the submission.
- Positional setup — start from a stable, dominant position.
- Control before transition — secure the arm before you move.
- Recognising an opening — a straightened or reaching arm.
- Maintaining balance — stay based as you rotate into position.
- Moving between positions — smooth, controlled motion into alignment.
- Avoiding rushed attempts — if control isn't there, reset rather than force.
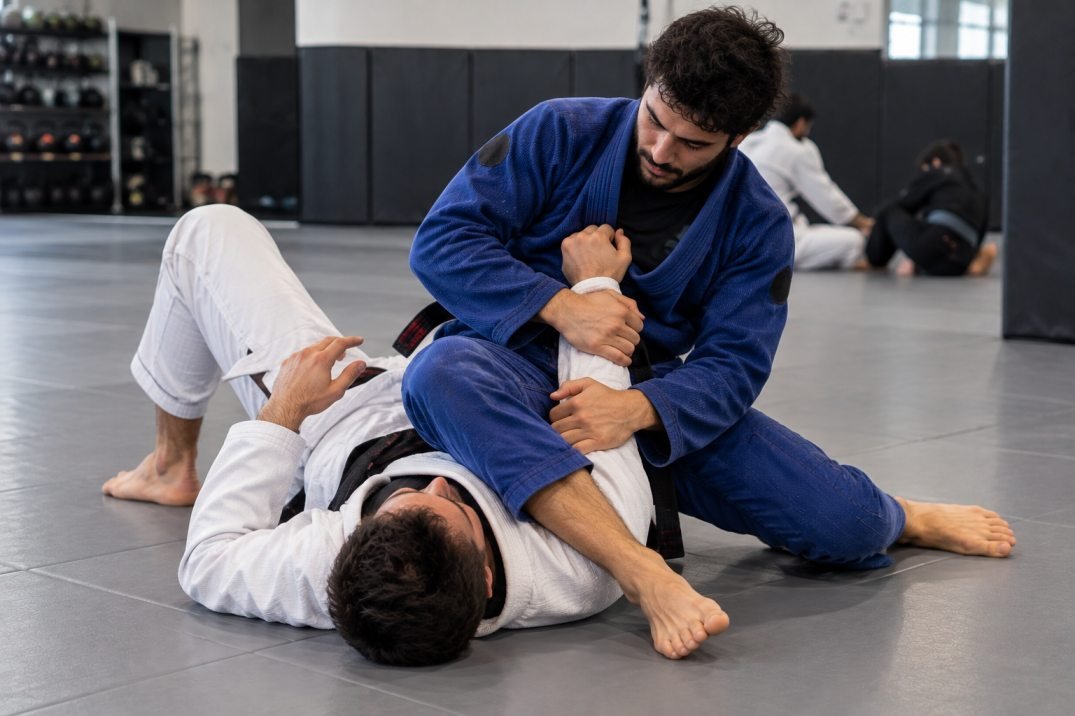
BJJ armbar drills for beginners
Controlled, technique-focused drills — movement and objectives, not injury mechanics. Drill slowly and reset often.
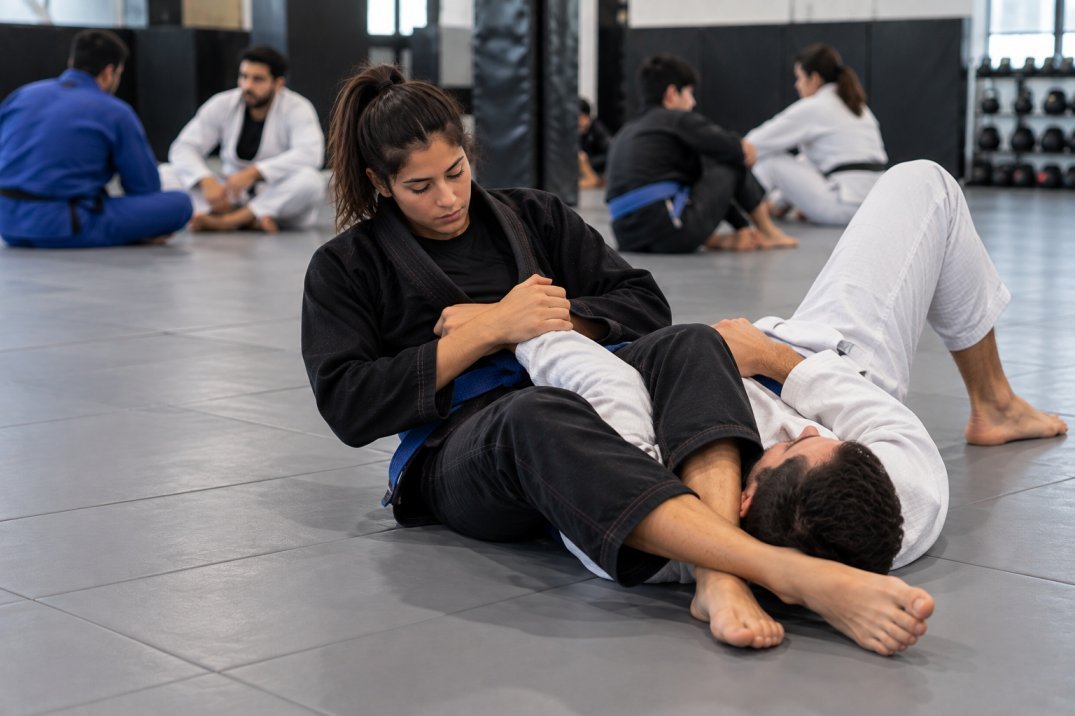
Armbar Position Recognition
BeginnerPurpose: learn what the finished armbar position looks and feels like.
Starting position: the settled armbar position.
General movement: settle, check alignment, hold briefly.
Objective: recognise correct hip and leg placement.
Partner: cooperative partner or dummy.
Reps/time: 5–8 controlled holds.
Safety: no finishing pressure; position only.
Controlled Arm-Isolation Drill
BeginnerPurpose: practise separating and controlling one arm.
Starting position: a dominant top position.
General movement: trap and control a single arm.
Objective: keep the arm isolated as the partner shifts.
Partner: cooperative partner or dummy.
Reps/time: 8–10 reps each side.
Safety: control the arm; no twisting or cranking.
Hip-Rotation Movement Drill
BeginnerPurpose: groove the hip movement the armbar relies on.
Starting position: on your back or in guard.
General movement: rotate hips and swing a leg over.
Objective: smooth, balanced hip rotation.
Partner: solo.
Reps/time: 10 each side.
Safety: mat space only; controlled movement.
Guard-to-Armbar Movement Drill
Beginner–IntermediatePurpose: practise the entry motion from guard.
Starting position: closed or open guard.
General movement: control, angle off, move into position.
Objective: reach alignment without losing control.
Partner: cooperative partner or dummy.
Reps/time: 6–8 controlled reps each side.
Safety: stop at the position; no finish.
Mount-to-Armbar Transition Drill
Beginner–IntermediatePurpose: practise the entry motion from mount.
Starting position: stable mount.
General movement: isolate an arm, rotate to the position.
Objective: keep balance through the transition.
Partner: cooperative partner or dummy.
Reps/time: 6–8 reps each side.
Safety: controlled rotation; reset, don't finish.
Positional Armbar Recognition
BeginnerPurpose: spot when an armbar opening exists.
Starting position: a dominant position.
General movement: identify the opening, then reset.
Objective: recognition and patience, not finishing.
Partner: cooperative partner or dummy.
Reps/time: 5–8 reps.
Safety: recognise and reset; never force.
Control-and-Reset Drill
BeginnerPurpose: reinforce control over finishing.
Starting position: the armbar position.
General movement: hold control, then release and reset.
Objective: maintain the position under small movement.
Partner: cooperative partner or dummy.
Reps/time: 3–5 minutes.
Safety: no straightening pressure; hold and reset only.
Armbar Transition Flow
IntermediatePurpose: link the armbar position to an exit.
Starting position: the armbar position.
General movement: if the arm slips, flow to another control.
Objective: stay dominant when the finish isn't there.
Partner: cooperative partner.
Reps/time: 5–6 reps each side.
Safety: controlled pace; communicate throughout.
Submission-Awareness Drill
BeginnerPurpose: read arm exposure in live-ish movement.
Starting position: light positional movement.
General movement: call out arm openings as they appear.
Objective: train the eyes, not the finish.
Partner: cooperative partner.
Reps/time: 3–4 minutes.
Safety: recognition drill only; no submissions applied.
Defensive Recognition Drill
Beginner–IntermediatePurpose: feel the armbar threat against you early.
Starting position: a position where your arm is at risk.
General movement: recognise the threat, protect the arm.
Objective: early recognition and arm protection.
Partner: cooperative partner.
Reps/time: 5–8 reps each side.
Safety: partner applies threats slowly; tap early if needed.
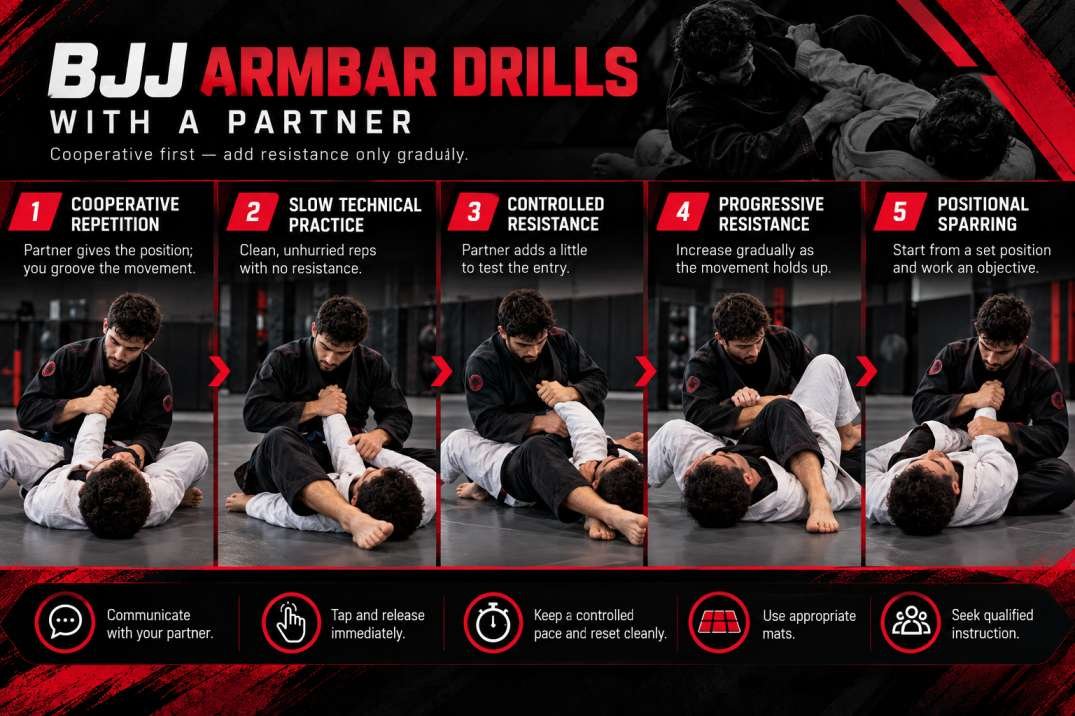
BJJ armbar drills with a partner
Partner drilling follows an intensity ladder — beginners should not jump straight to hard resistance.
- Cooperative repetitionPartner gives the position; you groove the movement.
- Slow technical practiceClean, unhurried reps with no resistance.
- Controlled resistancePartner adds a little to test the entry.
- Progressive resistanceIncrease gradually as the movement holds up.
- Positional sparringStart from a set position and work an objective.
Throughout: communicate, tap and release immediately, keep a controlled pace, reset cleanly, use appropriate mats and seek qualified instruction. The finish is always applied slowly — the goal is learning, not a fast tap.
Solo BJJ armbar drills
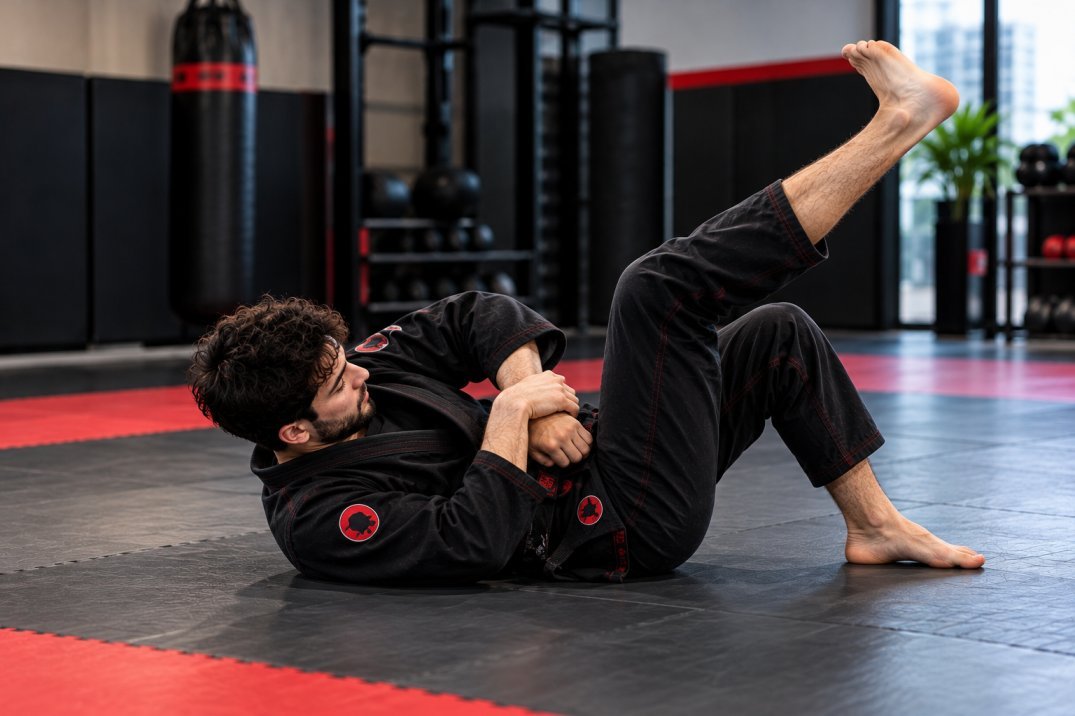
Plenty of the armbar's movement can be trained alone.
What you can drill solo: hip-rotation patterns, positional movement, the entry motion as shadow grappling, transitions, mobility and movement repetition. This builds the body mechanics that make the armbar smooth. For a wider solo routine, see our guide to solo BJJ training.
What solo work can't reproduce: live resistance, opponent reactions, realistic timing, grip fighting, partner feedback and live defensive movement. Solo armbar practice grooves the motion — it isn't equivalent to live BJJ and shouldn't be treated as such.
Can you practise armbar drills with a grappling dummy?
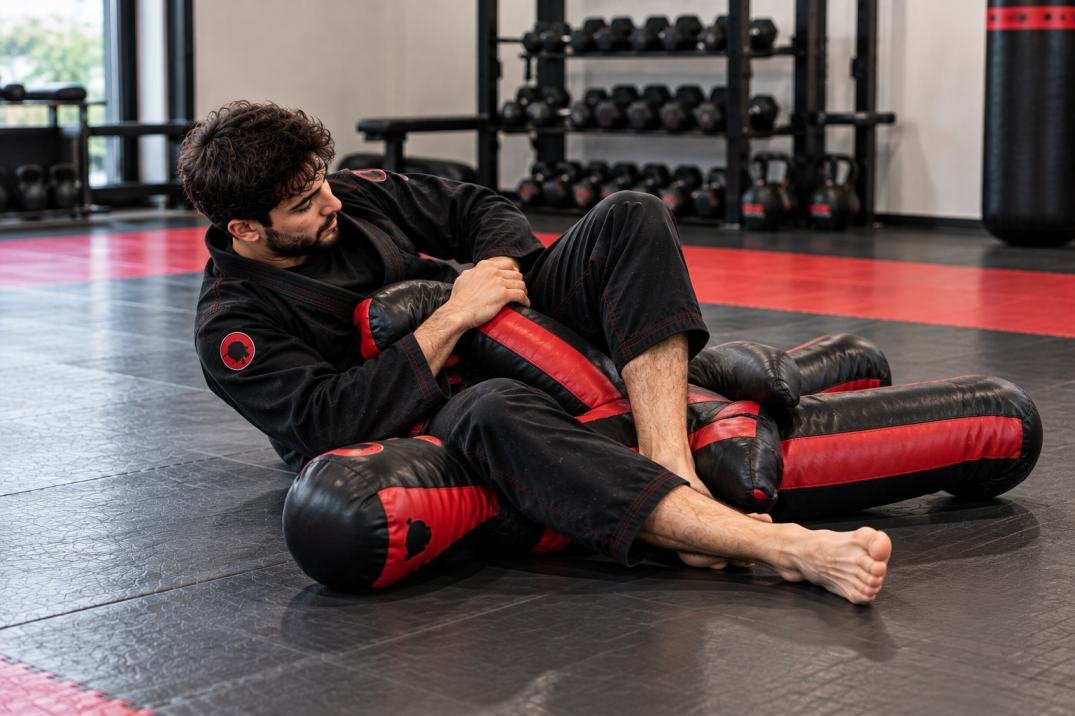
A suitable grappling dummy can support technical repetition — positional familiarisation, body positioning, transition practice, movement patterns and controlled repetition of the entry motion. It gives solo armbar work a body to organise around, which is hard to replicate with shadow drilling alone. For a broader dummy library, see our BJJ dummy drills.
The limits are real: a dummy offers no active resistance, no realistic reactions, no live defense, no live timing, no grip fighting and no partner feedback. It supplements rather than replaces qualified coaching, live partners, positional sparring and live rolling. And not every dummy is designed for this kind of use — flexibility and limb positioning vary — so follow the manufacturer's intended use, and see how to choose a grappling dummy if you're comparing options.
Building a home setup? A grappling dummy can be useful for movement and positioning reps between classes. Explore the Home Gym Goals BJJ grappling dummy range to compare options suited to your space.
BJJ armbar defense and escape awareness
Learning the armbar means learning to recognise it coming. It helps to separate three related ideas:
- Armbar prevention — good habits that stop the attack starting: keeping elbows tight, not over-reaching, protecting arms in scrambles.
- Armbar defense — responding once a threat is developing: recognising the arm is at risk, improving posture and connection before the position is fully established.
- Armbar escape — recovering once the position is on: creating space and recovering a safer position — or tapping when appropriate.
Detailed position-specific escapes (from mount, side control and back) are deep enough to deserve their own guides, which are planned separately — here the focus is armbar-threat recognition and awareness.
Defense isn't a guarantee. Recognition and good structure reduce risk but never remove it — which is exactly why tapping early and training with control matter so much.
Armbar training from guard
Guard is a classic environment for armbar training because you can control posture and isolate an arm while your legs are already in play. Beginners should focus on controlling the posture, recognising when an arm is exposed, and the entry motion — plus the defensive habit of protecting their own arms when playing guard. This section stays armbar-specific; a full guard guide is a planned separate resource.

Armbar training from mount
Mount offers strong armbar opportunities because it's a dominant, high-control position. The priorities for beginners are positional stability, balance and control before attacking, then recognising the arm openings that appear as an opponent defends the mount, and the transition into the armbar position without getting bucked or rolled. A complete mount guide is planned separately.
Armbar training from other positions
Armbar opportunities also connect with side control, back control, and scramble or transition situations — often appearing mid-movement rather than from a static pin. The principle is unchanged everywhere: control and arm isolation first, then the entry. Detailed side-control and back-control training will live on their own dedicated pages (planned).
BJJ armbar training at home
Home practice is a supplement for movement and repetition.
What you can practise at home: solo movement, visualisation, positional movement, controlled dummy practice, transition repetition, mobility and conditioning. What can't be reproduced: live resistance, realistic reactions, partner feedback, live timing and live rolling.
Practical needs: suitable mats, enough space, appropriate equipment, controlled practice and — for technique — qualified instruction. Never practise submissions on untrained people, and never apply the armbar with speed or force during home drilling. For a full home routine, see BJJ training at home.
Common BJJ armbar training mistakes
Each one: what it is, why it matters, and the better approach.
- Trying to finish too quickly — rushing loses the arm; secure control first.
- Ignoring position — no position, no armbar; drill the position first.
- Poor arm control — a loose arm escapes; keep it isolated and connected.
- Losing balance — you get rolled; stay based through the entry.
- Ignoring hip positioning — the hips do the work; prioritise alignment over force.
- Training only one entry — you get predictable; drill from guard and mount.
- Ignoring transitions — you stall when the arm slips; drill the exits.
- Ignoring defense — half the skill is missing; drill recognition too.
- Too much resistance too early — it hides errors; add resistance gradually.
- Training too aggressively — injuries follow; keep the pace controlled.
- Continuing after a tap — the most serious failure; release instantly, always.
- Treating a dummy as a live opponent — it's a rep tool; use it for movement.
- Practising without adequate mats — avoidable risk; set up a safe surface.
- Skipping qualified instruction — bad habits compound; get technique checked.
- Speed over technical quality — clean beats fast; slow down until it's right.
How to progress your BJJ armbar training
A typical path. Progression depends on your instructor, gym, experience, goals, age and physical ability — there's no fixed timeline.
- Understand terminology and safetyLearn the language and how to tap.
- Learn positionsGuard, mount, side and back control.
- Learn armbar conceptsArm isolation, hips, alignment, control.
- Practise controlled entriesSlow, clean entry motions.
- Drill with a partnerCooperative repetition first.
- Add light resistanceTest the entry gradually.
- Use positional sparringStart from set positions with an objective.
- Apply in appropriate live rollingUnder suitable supervision.
30-minute BJJ armbar training session
A supplementary beginner session. This does not replace coached BJJ training.
| Activity | Time | Purpose | Format |
|---|---|---|---|
| Warm-up | 5 min | Mobility, raise heart rate | Solo |
| Movement | 5 min | Hip rotation, positional movement | Solo |
| Position review | 5 min | Guard & mount control | Partner / dummy |
| Armbar technical drilling | 10 min | Entries & control-and-reset | Partner / dummy |
| Defensive awareness | 3 min | Threat recognition | Partner |
| Review / cool-down | 2 min | Mobility, note what to refine | Solo |
BJJ armbar training by skill level
Appropriate emphasis at each stage — progress under qualified coaching.
- Complete beginner — safety, positions, movement, basic armbar awareness.
- Beginner — controlled drilling, entries, transitions, defense recognition.
- Intermediate — timing, chaining, reactions, positional sparring.
- Advanced — decision-making, combinations, resistance and timing, developed with coaching. (Advanced finishing detail belongs in the gym, not a web article.)
Equipment for BJJ armbar training
Little is essential — coaching and mat time matter most.
| Tier | Item | Why |
|---|---|---|
| Essential | BJJ / grappling mats | Safe surface for ground drilling |
| Essential | Appropriate clothing | Gi or no-gi kit you can move in |
| Essential | Training partner / coaching | The only source of live feedback |
| Useful | Grappling dummy | Solo movement & positioning reps |
| Useful | Timer | Structuring rounds and drills |
| Optional | Mobility equipment | Supporting hip mobility for the entry |
A grappling dummy and the rest of your home gym equipment round out a home setup — but equipment never replaces instruction. When you're comparing gear, you can shop all training equipment in one place.
BJJ armbar training vs general submission training
Where this page sits in the wider topic — this distinction is what keeps each page distinct.
| Training topic | Main focus |
|---|---|
| BJJ armbar training | Armbar-specific training and drilling (this page) |
| Submission training | Broad submission education and concepts |
| Submission grappling drills | Broader submission-focused drill library |
| BJJ guard training | Guard-specific development |
| BJJ mount training | Mount-specific development |
| BJJ dummy drills | Drills performed specifically with a dummy |
| BJJ training at home | The complete home-training routine |
In short: submission training is the broad education, submission grappling drills are the wider drill library, and this page is the armbar-specific corner within them.
BJJ armbar training: quick answers
Concise, self-contained answers to the most common questions.
- What is BJJ armbar training? Structured practice of the positions, control, entries and movement used to develop the armbar in BJJ — starting with control before finishing.
- How is it different from submission training? Submission training is the broad system; BJJ armbar training is the armbar-specific corner of it.
- How is it different from submission grappling drills? Those are the wider drill library across many submissions; this page focuses only on the armbar.
- How is it different from BJJ dummy drills? Dummy drills are defined by the tool; armbar training also covers partner, solo and positional work.
- Can beginners train the armbar? Yes — starting with position, control and safe habits before finishing, under coaching where possible.
- What positions can you train it from? Guard, mount, side control, back control and scramble situations.
- Can you drill it solo? The hip movement and entry motion, yes; live resistance and timing need a partner.
- Can a grappling dummy help? Yes, for movement and positioning reps — but it can't resist, react or replace a partner.
- What matters most in the armbar? Position, arm control and hip alignment — the finish follows from those.
- Is it safe? When drilled slowly with control and early tapping, yes — though no training is risk-free.
Add a dummy to your armbar drilling
A grappling dummy can be useful for controlled movement and positioning reps between classes. Compare options suited to your training space.
Frequently asked questions
Short, direct answers to the questions beginners ask most about the armbar.
What is an armbar in BJJ?
A BJJ armbar is a joint lock that isolates an opponent's arm and uses your legs, hips and body position to apply straightening pressure to the elbow, ending the round when they tap. It's built on arm control and hip alignment rather than strength.
What is BJJ armbar training?
It's the structured practice of the positions, control, entries and movement that make the armbar work — starting with position and arm control before the finish, and drilling entries from guard, mount and other positions.
What are the best armbar drills for beginners?
Position recognition, controlled arm isolation, hip-rotation movement, and the guard-to-armbar and mount-to-armbar entry drills. These build control and the entry motion before any finishing pressure.
How do beginners practise the armbar?
Slowly and cooperatively: drill the position and arm control first, then the entry motion, then add light resistance over time. The finish is always applied gradually, and you reset rather than force when control isn't there.
Can you practise BJJ armbar drills at home?
Yes, as a supplement — hip movement, the entry motion, positional movement and controlled dummy practice. Live resistance, timing and partner feedback still require a training partner and coaching.
Can a grappling dummy help with armbar training?
Yes, for positional familiarisation, body positioning, transitions and movement repetition. It can't provide resistance, reactions, live timing or feedback, so it supplements rather than replaces a partner or coach.
Is the armbar suitable for BJJ beginners?
Yes — it's one of the first submissions most gyms teach. Beginners should learn it progressively, prioritising position, control and safe tapping habits over finishing speed.
What positions can you train the armbar from?
Most commonly guard and mount, and also side control, back control and scramble situations. The principle is the same everywhere: control and arm isolation first, then the entry.
How often should I practise armbar drills?
A little and often works well — armbar drilling fits naturally into 1–3 weekly sessions alongside your other training, depending on experience, recovery and coaching. Consistent, clean reps beat occasional long sessions.
What should I learn before training the armbar?
Basic positions and safety first: how to establish and hold guard and mount, how to move your hips, and how and when to tap. Position before submission applies from day one.
Is armbar training dangerous?
There's inherent risk in any joint-lock training, but beginners drill it safely every day through slow, controlled practice, clear communication, early tapping and immediate release. Apply the finish gradually and never crank.
Why is arm control important in the armbar?
Because the whole submission depends on keeping the arm isolated and connected. If the arm slips free, there's no armbar — which is why drilling arm control comes before drilling the finish.
Should beginners train armbars with resistance?
Not at first. Begin cooperatively to groove clean movement, then add light and progressive resistance over time. Too much resistance early hides technical errors and raises injury risk.
Can you practise armbar movement without a partner?
Yes — the hip rotation and entry motion drill well solo or on a grappling dummy. What you can't train alone is timing, resistance and a partner's defensive reactions.
How does armbar training fit into submission grappling?
The armbar is one of the core submissions within submission grappling. Training it develops arm control, hip movement and submission awareness that carry across the broader submission game.
What equipment do I need for armbar training?
Essentials are suitable mats, training clothing and a partner or coaching. A grappling dummy and a timer are useful for solo movement and positioning reps, and mobility gear is optional.
How can beginners improve their armbar?
Drill the position and control before the finish, work the entry from more than one position, add resistance gradually, train the defense too, and get your technique checked by a qualified coach.
What is the difference between armbar training and submission training?
Submission training is the broad education across all submissions and concepts; BJJ armbar training is the specific, drill-focused practice of the armbar within that wider system.
Explore grappling & BJJ training resources
Continue building your game with these guides and equipment.
This guide provides general beginner information about BJJ armbar training and drills. It is educational and is not medical advice or a substitute for qualified, in-person coaching. Learn joint locks such as the armbar from a qualified instructor where possible; drill slowly and with control, communicate with partners, apply pressure gradually, tap early and release immediately when a partner taps. A grappling dummy is a fixed training tool that cannot provide live resistance, reactions or coaching, and which drills it suits depends on its design and the manufacturer's intended use. No training is risk-free or injury-proof, and the armbar is not presented as a guaranteed self-defense technique. Explore more at Home Gym Goals.